
This page was archived in 2023 as part of the Mac Hut archive and is no longer updated.Most of the site pages were last updated around 2008 and some information may be out of date. Become a patron: Support our efforts by contributing a small amount each month to cover our hosting costs and the time it takes to archive these pages properly. Thank you. |
Got here from the web? Check out the homepage
Need to use an external 1.44MB floppy disk drive with you vintage Macintosh? Good luck finding one. External SuperDrives are a very rare beast, indeed. I've heard that more-common 800kB external floppies can be upgraded to 1.44MB by simply swapping in a SuperDrive from a Mac.I was suspicious. Finding an 800kB external at the thrift store, I decided to try it out.
I'm happy to report that you CAN upgrade an 800kB external Apple floppy drive to 1.44MB just by swapping in a new floppy mechanism from an old junked Mac. Here's some notes to make the experience easier:
When reassembling the case-bottom to the floppy drive, remove the daisy-chain port cover first. Otherwise, the port cover will shoot off into the floor when you put the case-bottom in place.
Disconnect the eject button. The eject button is the black two-wire connector at the rear of the floppy drive. Macintosh System Software deals gracefully with it--sorta. Pressing the eject button ejects the floppy disk and leaves a ghosted icon on the desktop. That's great.
Unfortunately, on my SE/30 running 7.5.5, the floppy drive then stops working until something is stuck into the emergency eject hole. Having your floppy drive stop working when you accidentally hit the eject button sounds really inconvenient. I solved that problem by disconnecting the eject button entirely.
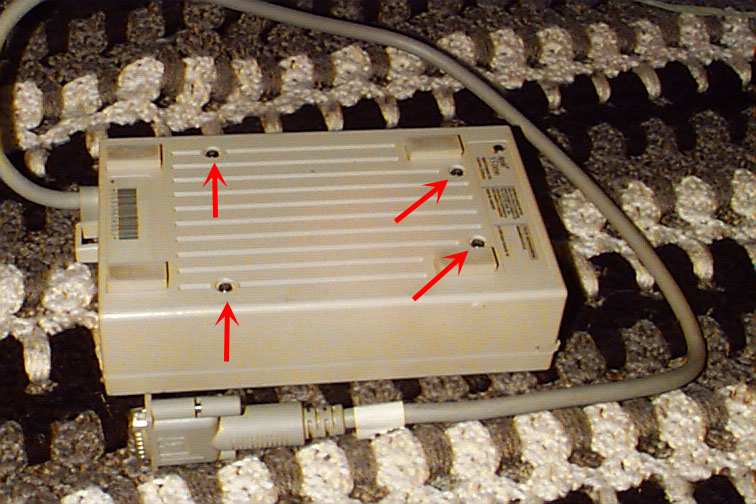
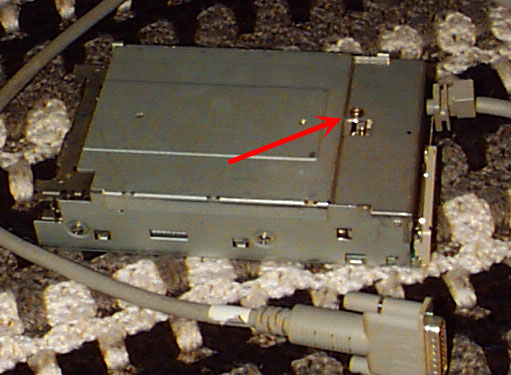
Flip the floppy drive over and remove the 4 Phillips screws that are obviously accessable.
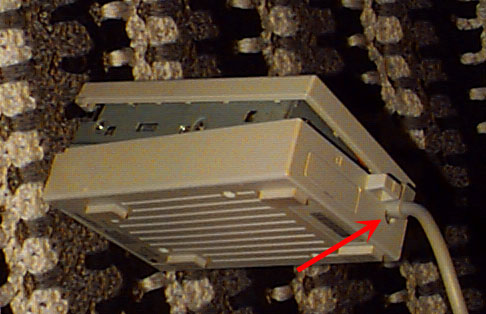
Now, all that holds the case halves together is the tight fit of the rubber cable-sleeve in its hole. Hold the top case-half and the cable in one hand, and seperate the case-bottom using your other hand.
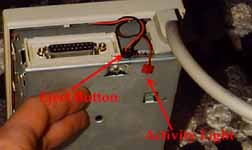
Removal of the top case-half is also easy. Disconnect the red activity light connector and black eject button connector from the rear of the adaptor circuit board.
Now, slide the top case half forward slightly (about 1/8 inch) and it'll come free.
Now you've removed the case from the floppy drive. To remove the floppy mechanism from the internal frame, first remove the back access door. Remove the 1 Phillips screw on the top back middle of the internal assembly. Now, the rear access door will slip off of the metal pegs that fix it in place. The cable is attached to this door, so it's a little hard to move-always wanting to go back where it came from.
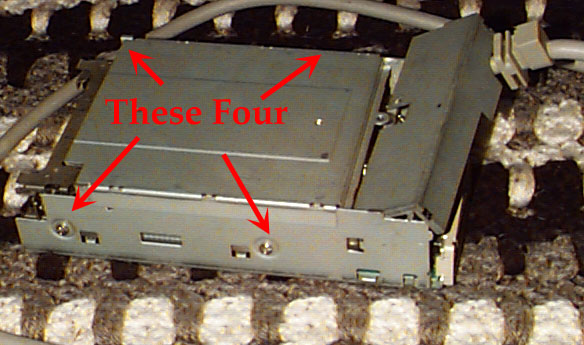
Next, remove the 4 Phillips screws from the perimeter of the internal assembly. These fix the floppy mechanism itself into the internal frame. Slide the floppy mechanism forward slightly to allow more room to reach the cable.
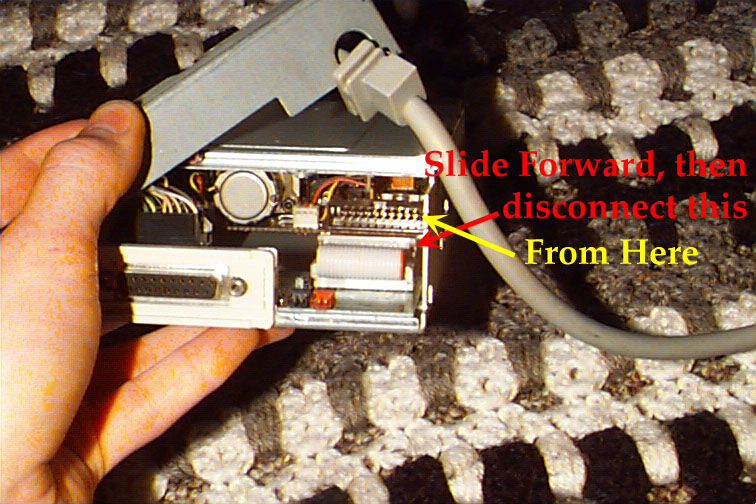
Then, reach in through the (open) back access door and disconnect the 25-pin header from the floppy mechanism. Slide the floppy mechanism the rest of the way out.
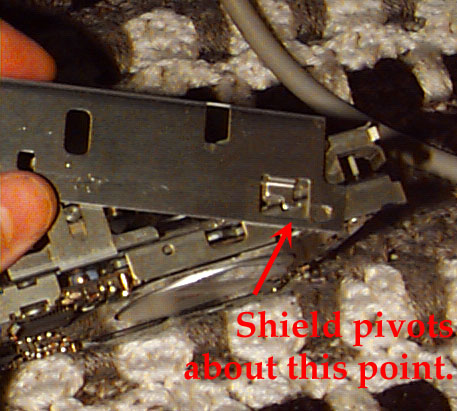
Finally, remove the small metal shield from the floppy mechanism. It's not fixed in place, it just rests atop the mechanism. Lift it from the rear of the mechanism and it will pivot about two small metal tabs near the front. Rotate it clear and remove it.
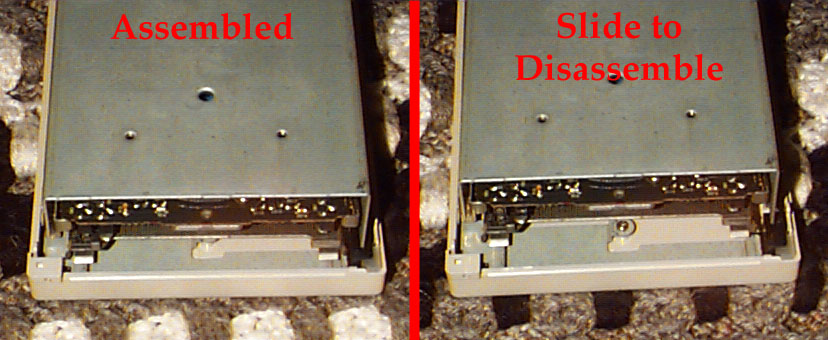
Assembly is the reverse of disassembly. Make sure to use a 1.44MB floppy mechanism. ;-)
Text and Images copyright 2003-2008 Tyler Sable