IDE HD Removal
[Return to the 1st page]
When installing a new IDE drive in the 6400, make sure you set the jumpers to "master" or "single" and not "slave" or "cable select". Some newer drives may come as "cable select" and this setup won't work on the 6400.
The Mac can only address HD's up to 132GB in size so currently the largest HD you can use on the stock IDE bus is the 120GB HD. There are larger drives available like Maxtors 160GB drive but you need a PCI IDE card that is ATA/133 compliant or faster to address these HD's. The ATA/133 spec has the ability to address these larger HD's. Unless manufacturers of the slower cards, like ATA/100 or ATA/66 cards, make firmware updates to address larger HD's, then the ATA/133 cards or better will be the only ones that will work with extremely large HD's
Directions for swapping out stock IDE HD from Sean: Sean sent me some very detailed instructions on installing a new IDE HD in your 6400/6500. It starts with backing up your software to installing the new HD and restoring your data. Thanks Sean!
You must first have removed the front cover
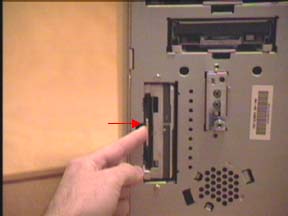
Push in on the clip and pull out the drive
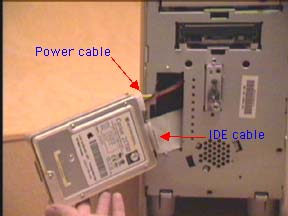
You have to remove these cables. Take care not to damage the connector or cable. The IDE cable has a label on it which is a good location to grab and pull off this cable.
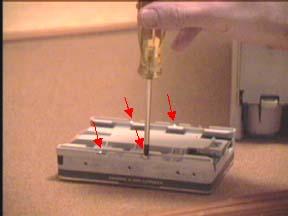
The drive sled removal is similar to all drives so the following pictures will be used over and over
remove these 4 screws
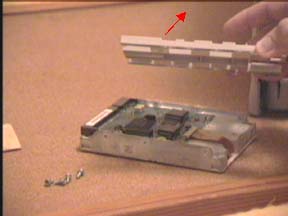
lift off sled
reinstall in reverse order