Fabricate a CD Bezel for the Top Bay
[Return to the 1st page]
I am using one of my 6400's as a file server / CD burning station so I moved my external CDR to the upper bay. I did not like the way it looked without a top bezel so I decided to make my own out of an old bezel I had. This does take some skill if you want it to look even half way decent and as you'll see, I rushed mine :)
Click here for instruction on how to remove the front covers.
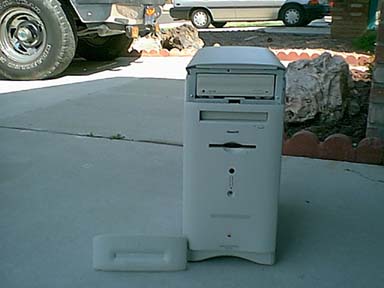
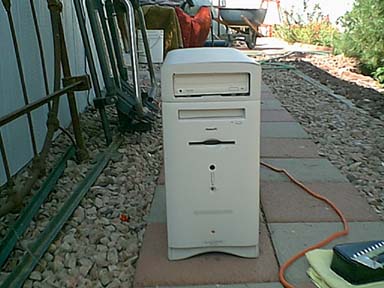
Here is a before picture of my 6400 and the stock bezel that I cut up. It was a ZIP bezel original from Apple that I never used because the case of this 6400 had been dropped by Circuit City which bent it so the ZIP slot never lined up right. This did allow me to purchase it for very little money though :) Anyway, I thought I would put the bezel to good use finally.
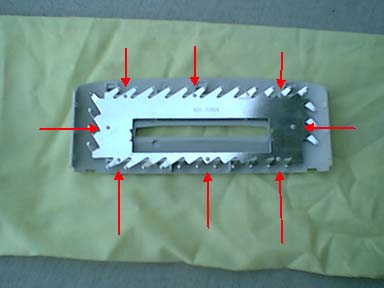
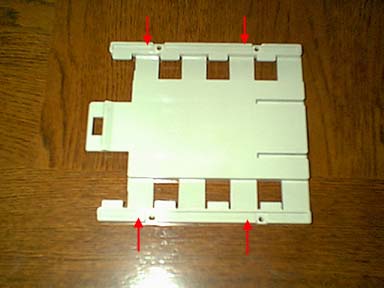
First you have to cut these 8 plastic welds to remove the metal shield from the back of the bezel.
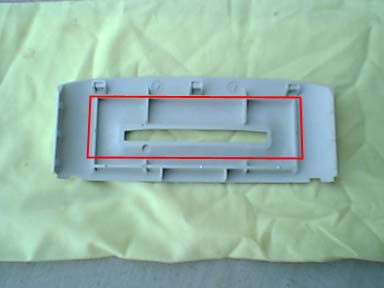
Now you'll see what appears to be a square the size of a CD ready to cut out. This is not the actual size of a CD drive which I found out too late :( I drew a red line to help show the actual size of a CD drive compared to the bezel design. It is roughly 1/4" longer on both sides and 1/4" short of the bottom of the square. This is just a rough estimate so please take the time to measure. Wish I did!
Here is how it looks when cut out wrong :) The bottom shows to much space and the sides won't allow the tray to open. I used a Dremel Tool to make the cuts. Then went back with a file and sandpaper to smooth it out after all the major cuts where complete.
Here it is with the sides cut wider so the tray can open. I also cleaned up the edges as much as I could to get rid of some of the jaggies. Since I cut too far in certain spots I was unable to clean it up real nice. Also note the drive looks sunk in. Lets fix this
To move the drive forward I just drilled new holes about 1/2" forward of the original holes.
Now it looks better. The space at the bottom is still too much and I don't know how to fix this yet?

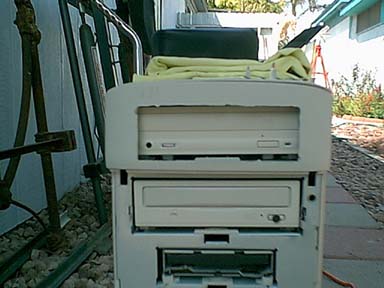
Here's a better angle to let you see how the drive mates with the front of the covers. Not bad!

So with a little more planning and measuring, you to can have a CD drive bezel for your 6400. If you make a mistake you can get a new bezel from www.welovemacs.com but it will be for a ZIP/JAZ drive. Maybe it would be better to buy this first to cut up so you can fall back on the original in case of mistakes :)
Have fun!
PS. I would like to thank my friend Bill for allowing me to use his tools :) Bill is into PC's as much as I'm into Mac's and he was pretty impressed with the final look of this project.
Another 6400 owner cuts his own upper bay bezel for a CDROM 6/23/2001
Marco sent me some pics of his attempt to cut the bezel of the upper bay to accommodate a CDROM. Thanks Marco. His job was much better then mine :) It just takes some patients.