Here are instructions from Tiong on how to install a PCI card that is longer then 8". An 8" card like the Voodoo2 video card fits fine and doesn't need any mods done. Thanks Tiong.
You must first remove the mother board.
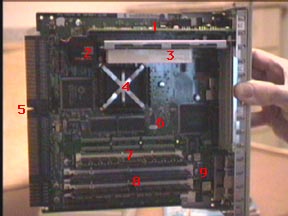
We will be dealing with #3 which is the PCI slot riser card. It is located just above the CPU.
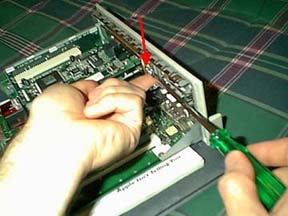
I know you've seen this picture before and I'm showing it again because I'm pointing at the outside covers of the PCI slots just so you know where we are working from an outside point of view.

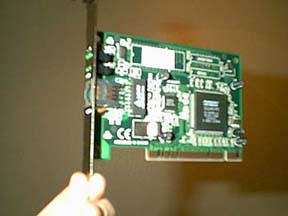
This is a what a typical PCI card looks like. This one happens to be a Farallon PCI 10/100 Fast Ethernet card. Notice where I am holding the card. This is a good place to hold a PCI card until its time to place it in the Mac.
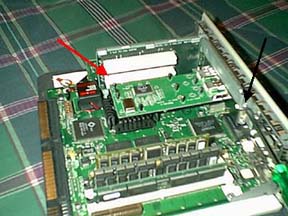
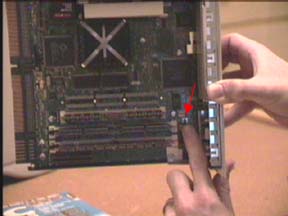
I already have an ADS USB card installed in the lower PCI slot so we will be using the second slot (red arrow) in this case. First you have to remove the PCI slot cover plate with a philips screwdriver (black arrow). This is the cover I was pointing to earlier.
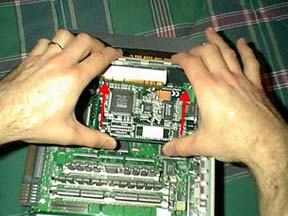
With the connector lined up with the slot grab the PCI riser card and the back edge of the new PCI card and squeeze the two together. It will make a loud snap when in place. Sometimes the PCI card does not fit just right and you have to work it towards the PCI cover a bit. The cover has little spring pieces of metal sticking out of it to put force on the card when installed. This might cause some PCI cards to have a bit of trouble lining up the connector. You will know when the card is installed properly when you hear a loud CLICK.
With the card in place you can put the screw back in that we removed to get the PCI cover off. Now this screw secures the PCI card in place.
Always press the mother board reset button once installation or removal of any card is complete
reinstall in reverse order